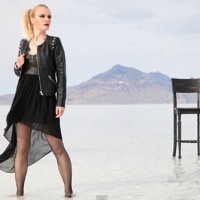
This Photoshop Tutorial is about retouching a simple photo to create a portfolio kind of look. Have a look at what we are going to create.
Final Image

We will start the tutorial by opening the source image in photoshop. You can use any photo of your choice. I am using a stock image from DeviantArt for this tutorial.

We will start by setting the brightness of image by using the curve tool. Use the following settings.

Now your image will look like this.

There are lots of marks on the face of the girl so we will clean the face with spot healing tool.

After removing the marks from face create the duplicate image by pressing ctrl+J. Now apply the surface blur (Filter>Blur>Surface Blur) with following settings.

Now set the opacity of duplicate layer to 67% . Now select the eraser tool with 0% hardness and 100% opacity and clean the area around eyes and lips. Now select the apply image ( Image >Apply Image) option and set the following settings.

Your image is ready with a new life.

Loveish Kalsi
Loveish Kalsi is a freelance Web and Graphic Designer from India. He is the owner of famous design blog Creativedesignmagazine.com


Thanks for the tutorial. It sure did help.
Very good tutorial run through. I would be interested in seeing this however with the image made darker…so Im going to give it a go myself!