Designing an impressive business card that is ready for printing can be done pretty easily using Adobe Photoshop. All you need is the right font style, the right color scheme and of course just some creativity. In this tutorial, we are going to give you the key core steps that you should know so that you yourself should be able to create your own. Let us start.
STEP 1
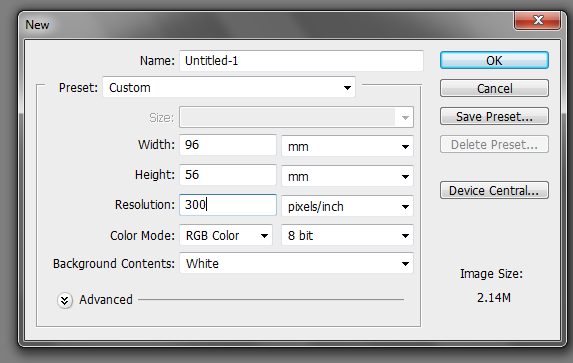
The first step is to setup your document settings correctly for a business card. A basic business card dimension is around 90x50mm. However, for print ready documents, you must add a bleed to these dimensions to take care of the discrepancies and mis-alignments. So for our example document we are adding 3mm to all the sides of the standard dimensions. Meaning an additional 6mm for the height and width. This means that we should set our new business card document to a 96x68mm dimension. Of course for the resolution, a 300ppi minimum value is a must.
STEP 2
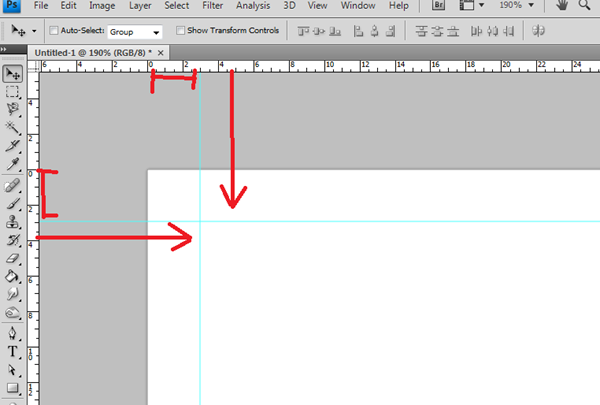
Once the new document is open, it is important that you setup the guides. To do this make sure you see the rulers in the edges of your canvass. If you don’t see them just press CTRL+R. Once you do see the rulers, simply click and drag the guidelines from them. Place these guidelines 3mm from the edge of our document for all side of the business card design.
STEP 3
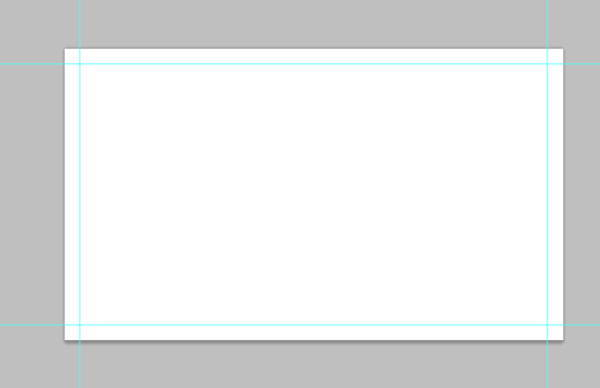
Once done, you should have something like this.
STEP 4
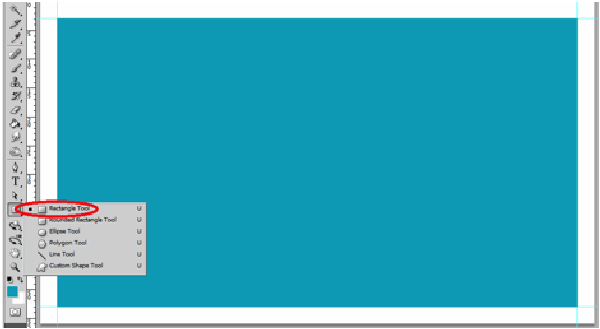
Using the Rectangle Shape tool, we create the background of our business card. Just create the rectangle and span the whole main area of the business card that spans the boundaries of the guideline. Of course, use your own personal theme color for this. For our example we used a nice blue (18a8c0) color.
STEP 5
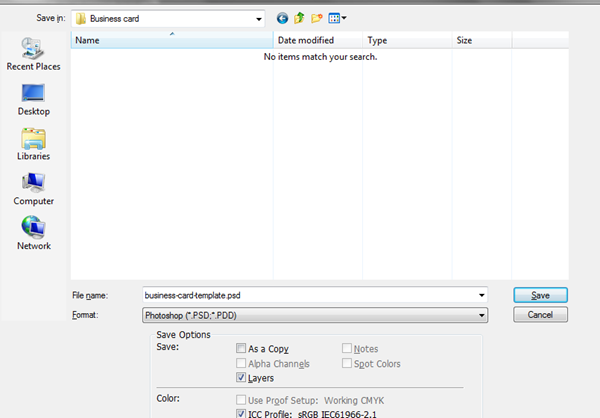
Great, now, save this document as this will be your main template for both sides of your business card. Name it something like “Blue Business card template.” Once you are done saving it, save the file again, and this time mark it as the front of your new business card. With that out of the way, you can then play with the front design.
STEP 6
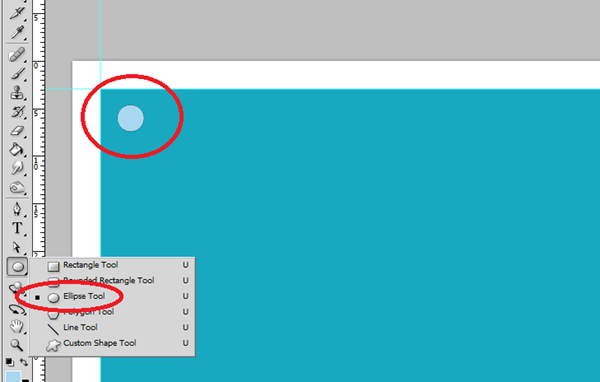
First up, we will add a circle. To do this, we simply use the elliptical shape tool. To make sure you create a perfect circle, hold down the SHIFT key as you inscribe the circle shape so that its proportions are constrained. Of course, use your own theme color for this.
STEP 7
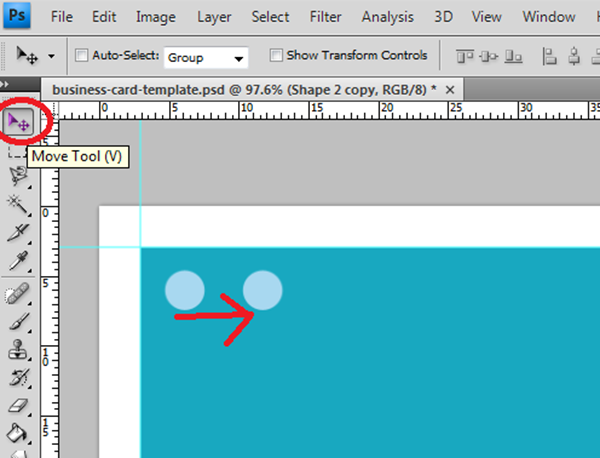
Now we will duplicate the circle several times. The fastest way to do this is to actually use hotkeys. First select the Move Tool (Shortcut V). Then with the circle layer selected, hold down the ALT key then click and drag the circle from its position. A duplicate should be created automatically.
STEP 8
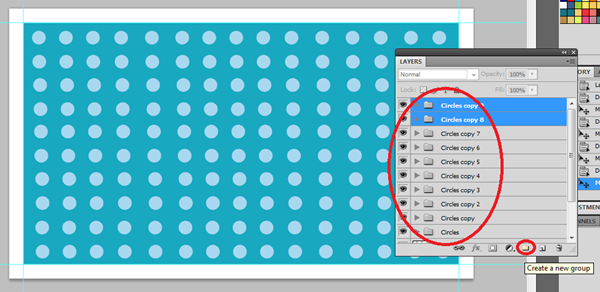
We Keep duplicating the circle until we fill up the whole design. Take note that you can group rows of these circles and then duplicate those rows quickly to make your job a little bit easier.
STEP 9
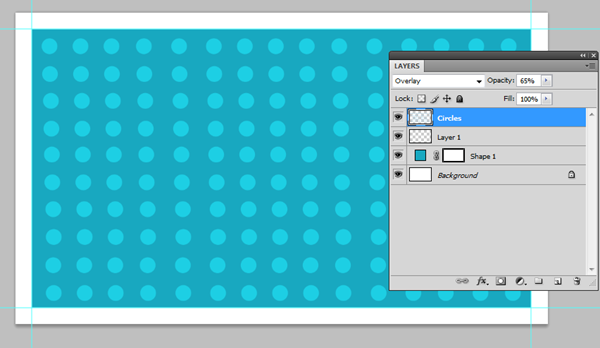
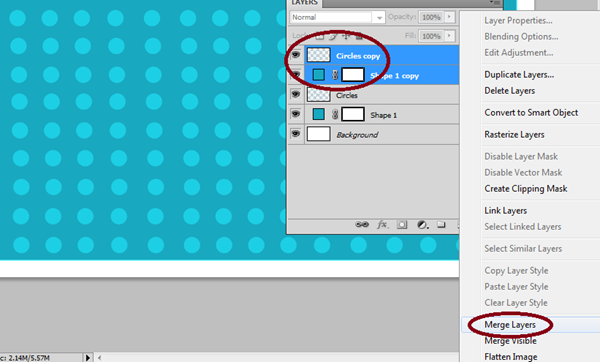
Now merge all those groups and circles by selecting them all and then merging the layers. Just right click on the selected layers and then choose “merge layers” in the context menu that appears. Change the blend mode to overlay and reduce the opacity of this layer to 65%.
STEP 10
The next step is just a little border trick. To do this, duplicate both our main circles layer and the main color layer. Do this by selecting both layers, and then pressing CTRL+J. Afterwards, merge them together by selecting and right clicking on them. Once the context menu appears, select “Merge Layers”.
STEP 11
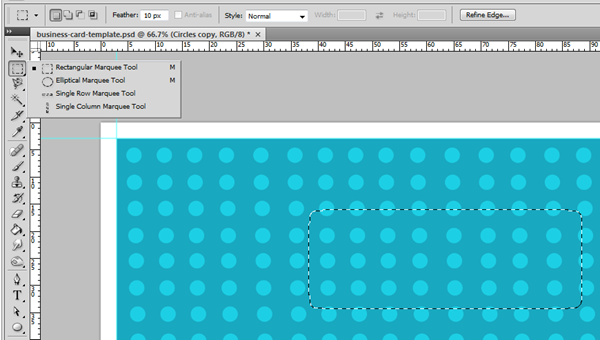
Now, with this layer active, use the rectangular marquee tool to select the area where you want the name to appear. Make sure that you set the feather value to 10px. For our example we selected an area at the center right of our design.
STEP 12
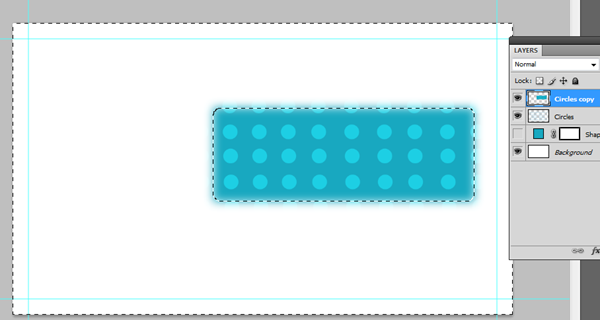
Press CTRL+SHIT+I to invert our selection to the outside bounds of our selected text area. Press Backspace or delete to remove those outward pixels. When we remove the visibility of the background layer, it should look like this. However, you actually do not need to remove the visibility, this is just for example purposes.
STEP 13
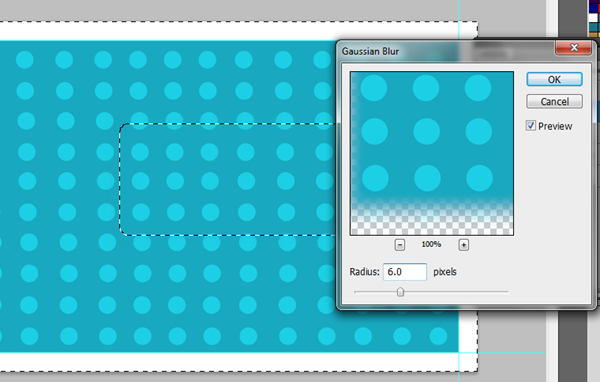
Now, go to Filter -> Blur -> Gaussian Blur. In the window that opens, use a radius of 6 pixels for the blur effect.
STEP 14
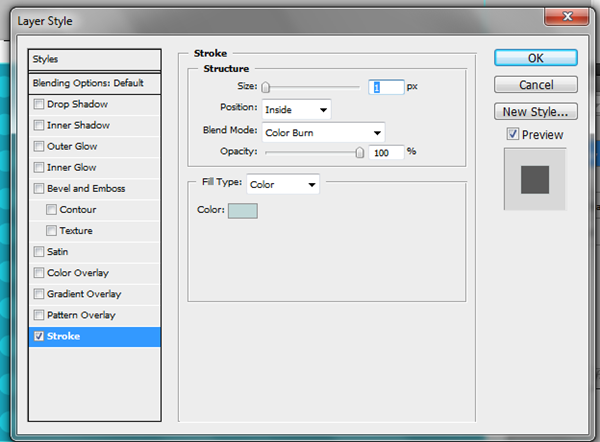
Next, double click on the layer to access its layer styles. Click on the Stroke option and use the following values:
a. Size: 1
b. Position: Inside
c. Blend Mode: Color Burn
d. Color: Lighter Theme color of your choosing. (here we used a light blue color)
STEP 15
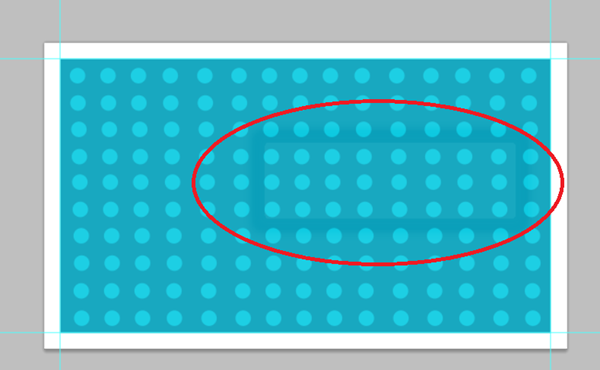
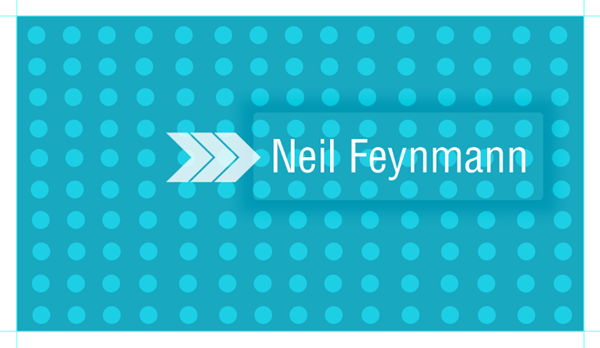
We should now have a subtle emphasis effect like this:
STEP 16
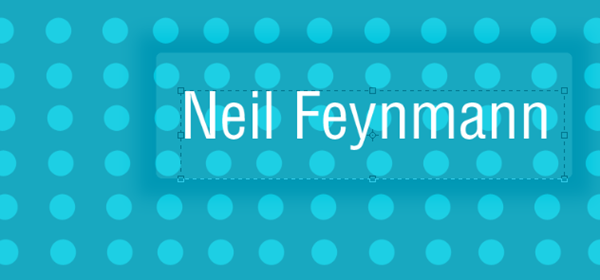
Now we type in the name for our business card. The font style choice is of course totally according to your taste. In our example we are using Helvetica Neue LT. However for the color, it is best to use a white color to contrast with all the color of our design.
STEP 17
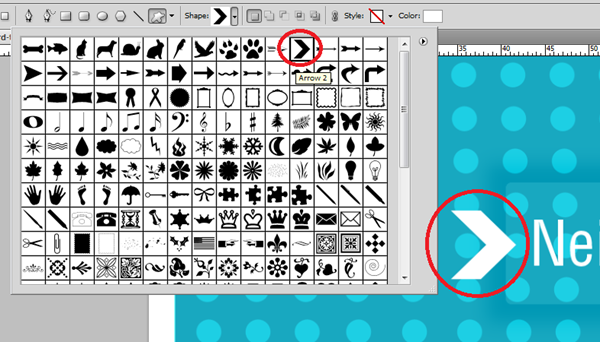
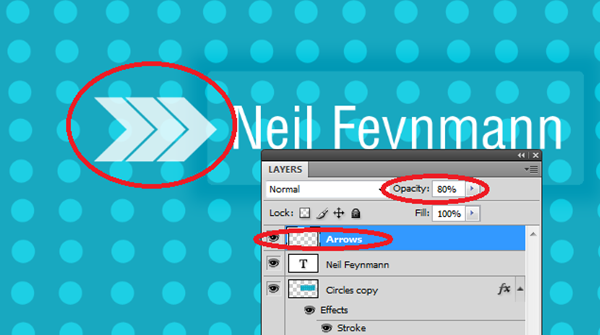
To add more emphasis to the name, we will add some nice arrows. We create the first arrow by using the custom shape tool and choosing a nice modern arrow shape (arrow 2). We then use a white color of this arrow and place it beside the name.
STEP 18
Then we just duplicate this arrow two times and place them side by side. We merge all the arrow layers into one. Then we reduce that merged layer’s opacity by 80%.
STEP 19
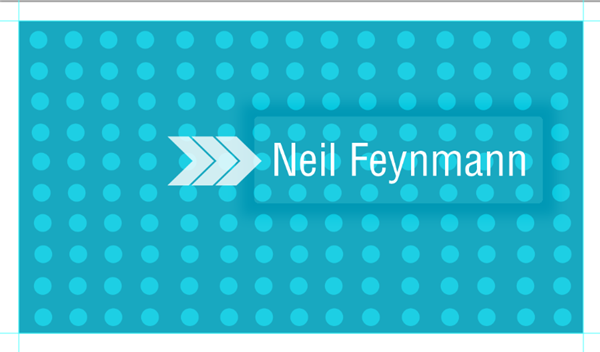
Great! Now our front part of the business card is done. Save this accordingly.
STEP 20
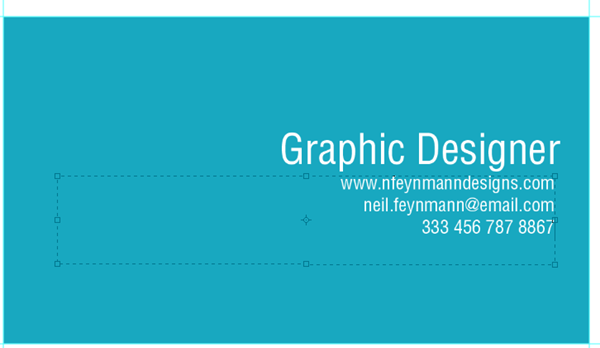
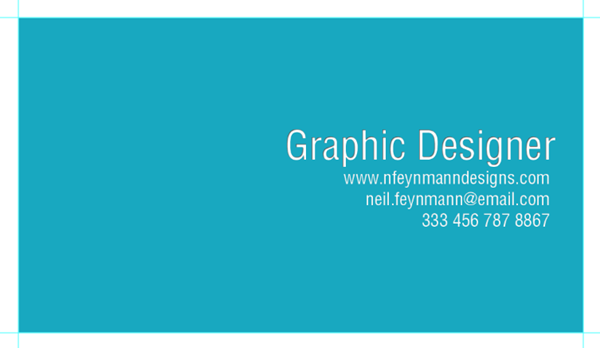
Now, for the back of the business card, we will just be using a simple layout setup. Open up our business card template that we created earlier. Now, just type in the business card details as you need. Vary the font size of the job description and the contact information of course.
STEP 21
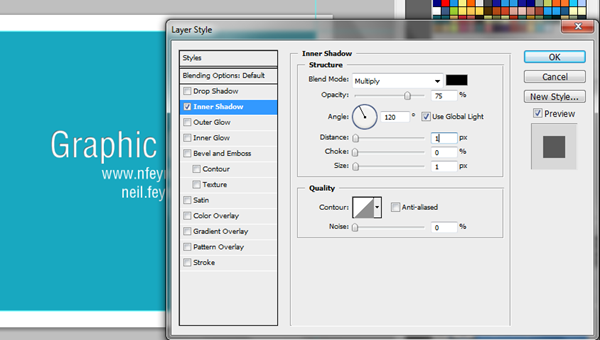
As a final touch, double click on the text layers to access their layer styles. Click on the Inner shadow option and then adjust these valued to get a great etched effect.
a. Distance: 1
b. Size: 1
FINAL IMAGE
Great! With that, we have finished the back as well. You can now send these for printing. Congratulations!
BACK IMAGE
FRONT IMAGE




When comparing your other designs, this is just ok.
hope to see more and good ones.
thanks